

Painting builder grade cabinets is an effective way to refresh and modernize your kitchen or bathroom without undergoing a complete renovation. These cabinets, often pre-fabricated and mass-produced, can easily be transformed with the right tools, materials, and techniques. By applying a fresh coat of paint, you can breathe new life into your space, personalize your décor, and increase the value of your home.
This guide on how to paint builder grade cabinets will walk you through the necessary steps to achieve a professional finish, ensuring that your cabinets not only look great but also stand the test of time.
What is Builder Grade Cabinetry?
Builder grade cabinets, also known as contractor-grade or stock cabinets, are typically installed in new homes or used as a cost-effective option for renovations. These cabinets are usually made out of lower quality materials and lack the customization options that come with higher-end cabinetry. However, their simple design and construction make them an ideal candidate for painting.
It’s important to note that not all builder grade cabinets are the same. Some may be made of solid wood, while others may be constructed using particleboard or MDF (medium-density fiberboard). Understanding the materials and construction of your cabinets will help you choose the right paint and preparation techniques for a successful painting project.
Materials and Tools You’ll Need
Before starting your project, gather all the necessary materials and tools to ensure a smooth process. Here are some essential items you’ll need:
Paint:
Choose a high-quality paint suitable for cabinetry, such as an acrylic latex or oil-based enamel. It should have good adhesion properties and provide a durable finish. Consider the color and finish options carefully, as they will have a significant impact on the overall look of your cabinets.
Primer:
A primer is essential for promoting adhesion and creating a smooth surface for the paint to adhere to. Make sure to choose a primer specifically designed for the type of paint you’ll be using.
Sandpaper:
Sandpaper is necessary to prep the cabinet surfaces before painting. You’ll need a medium-grit sandpaper (around 120-150 grit) for scuffing up the surface and a fine-grit sandpaper (around 220 grit) for smoothing out any imperfections.
Paintbrushes and Rollers:
Invest in high-quality paintbrushes and rollers to achieve a professional finish. A 2-inch angled brush is ideal for painting cabinets, while a small foam roller is perfect for applying paint on larger, flat areas.
Painter’s Tape:
Use painter’s tape to protect areas you don’t want to get paint on, such as walls, floors, and hardware.
Cleaning Supplies:
Make sure to thoroughly clean your cabinets before painting. You’ll need soap and water or a mild degreaser, along with a sponge or rag for wiping down the surfaces.
Optional Materials:
Depending on your cabinets’ condition and desired finish, you may also need wood filler for repairing any dents or scratches, as well as a deglosser or liquid sander to help with paint adhesion.
8 Simple Step-by-step Guidelines on How to Paint Builder Grade Cabinets
Step 1: Prepare the Area

Before you begin painting, it’s crucial to prepare your workspace to ensure a clean and organized environment. Start by removing all items from the cabinets, including dishes, cookware, and any other stored objects. Next, detach the cabinet doors and remove any hardware, such as knobs and hinges, labeling each piece for easy reassembly later.
Cover the floors and countertops with drop cloths or old sheets to protect them from any paint splatters or drips. Use painter’s tape to mask off edges, walls, and areas that you want to keep paint-free. A well-prepared area not only keeps messes to a minimum but also allows you to focus entirely on achieving a smooth, professional finish on your cabinets.
Step 2: Clean and Degrease the Surfaces
Before painting, you’ll need to remove any dirt, grime, or grease buildup on your cabinets. Using soap and warm water or a mild degreaser, scrub all surfaces thoroughly with a sponge or rag. Pay extra attention to areas around handles and knobs where there may be more buildup. Once clean, let the cabinets dry completely before proceeding.
The degreasing process is essential for promoting paint adhesion and ensuring a long-lasting finish. If your cabinets are particularly greasy, you may want to consider using a liquid sander or deglosser to help the paint stick better.
Step 3: Remove Any Imperfections
Inspect your cabinets for any dents, scratches, or other imperfections that need to be addressed before painting. Use wood filler to fill in any holes or gouges, and sand down rough areas with fine-grit sandpaper until they are smooth and even with the rest of the surface.

You may also want to remove any old caulk or sealant around the edges of your cabinets and replace it with new caulk for a clean and professional look.
Step 4: Sand the Surfaces
To ensure proper paint adhesion, you’ll need to rough up the surfaces of your cabinets using medium-grit sandpaper. This will help remove any glossy finishes and create a slightly textured surface to which the primer and paint can adhere. Be sure to sand in the direction of the wood grain, avoiding circular motions that can cause scratches.
After sanding, use a tack cloth or damp rag to wipe away any dust or debris left on the surfaces.
Step 5: Prime Your Cabinets
Using a high-quality primer designed for the type of paint you’ll be using, apply an even coat to all surfaces of your cabinets. A small foam roller is great for larger areas, while a brush can help reach tight corners and edges. Let the primer dry completely before proceeding.
Priming is crucial for promoting adhesion and ensuring a smooth base for the paint to adhere to. It also helps prevent stains or tannins from bleeding through the paint and affecting its color.
Step 6: Paint Your Cabinets
Using the same techniques as priming, apply at least two coats of paint to your cabinets, allowing each coat to dry completely before applying the next one. Again, use a roller for larger areas and a brush for corners and edges.

Depending on the type of paint and finish you’ve chosen, you may need to sand lightly between coats for a smoother finish. Be sure to remove any dust before applying the next coat.
Step 7: Reattach Doors and Hardware
Once your cabinets are fully painted, it’s time to reattach the cabinet doors and hardware. Use the labeled pieces from earlier to easily put everything back in its place.
If you’re using new hardware, make sure to drill holes beforehand according to your desired placement.
Step 8: Let Your Cabinets Cure
After completing all the painting steps, it’s essential to let your cabinets cure properly before using them. This process can take anywhere from a few days to a couple of weeks, depending on the type of paint and finish used.
During this time, it’s crucial to avoid any heavy use or contact with your cabinets that could damage the new finish. After curing, you’ll have beautifully painted builder-grade cabinets that add a fresh and updated look to your kitchen!
Following these simple guidelines on how to paint builder grade cabinets and using the right materials will help ensure a successful cabinet painting project. With some time and effort, you can transform your builder-grade cabinets into custom-looking pieces that elevate the overall aesthetic of your kitchen. Happy painting!
Maintenance and Upkeep
Once your cabinets are painted, regular maintenance and upkeep will help prolong their lifespan and keep them looking fresh. Avoid using harsh chemical cleaners on the surfaces, as they can strip the paint or damage the finish. Instead, use a mild soap and water solution to wipe down the cabinets regularly.
If any chips or scratches occur, touch-up paint can be used to fix minor imperfections. It’s also essential to address any water damage or leaks immediately to prevent further damage and maintain the integrity of your newly painted cabinets.
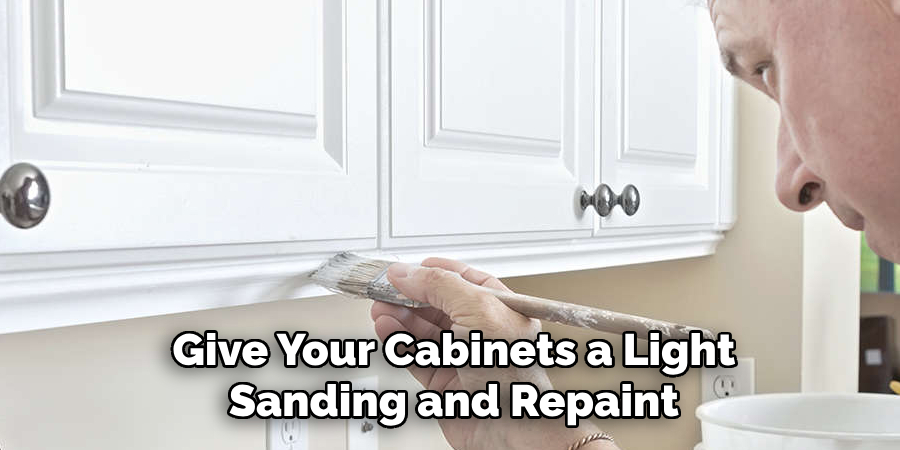
Additionally, every few years, it may be necessary to give your cabinets a light sanding and repaint them to refresh their appearance and keep them looking new. With proper care, your freshly painted cabinets can last for many years to come.
Safety Precautions and Best Practices
When painting cabinets, it’s essential to take proper safety precautions. Wear protective goggles and a mask when sanding or using chemicals to prevent any particles from getting into your eyes or lungs. Work in a well-ventilated area and take breaks if you start feeling light-headed or dizzy.
Also, make sure to read all product labels and follow the manufacturer’s instructions carefully. Some paints may require additional steps or have specific drying times that need to be followed for optimal results.
Lastly, any leftover paint or materials must always be properly disposed of according to local regulations. This not only helps protect the environment but also ensures the safety of those living in your household.
By following these maintenance tips and best practices, you can keep your newly painted builder-grade cabinets looking beautiful and functional for years to come.
Conclusion
Painting builder-grade cabinets is an affordable and effective way to update the look of your kitchen without breaking the bank. With the right materials and steps, anyone can achieve professional-looking results.
Remember to thoroughly prepare your workspace, clean and degrease surfaces, and follow each step carefully for best results. Thanks for reading this article on how to paint builder grade cabinets.
Check it out: How to Adjust Lumbar Support in Chair
Huston Douthit is a distinguished figure in the world of furniture design, with a decade of expertise creating innovative and sustainable furniture solutions. His professional focus lies in merging traditional craftsmanship with modern manufacturing techniques, fostering designs that are both practical and environmentally conscious. As the author of Fruniturix, Huston delves into the art and science of furniture-making, inspiring artisans and industry professionals alike.
Education
- RMIT University (Melbourne, Australia)
Associate Degree in Design (Furniture)- Focus on sustainable design, industry-driven projects, and practical craftsmanship.
- Gained hands-on experience with traditional and digital manufacturing tools, such as CAD and CNC software.
- Nottingham Trent University (United Kingdom)
Bachelor’s in Furniture and Product Design (Honors)- Specialized in product design with a focus on blending creativity with production techniques.
- Participated in industry projects, working with companies like John Lewis and Vitsoe to gain real-world insights.
Publications and Impact
In Fruniturix, Huston shares his insights on furniture design processes, materials, and strategies for efficient production. His writing bridges the gap between artisan knowledge and modern industry needs, making it a must-read for both budding designers and seasoned professionals.