

Are you tired of sitting on uncomfortable chairs? Do you want to save some money and build your own wooden chair instead of buying one?
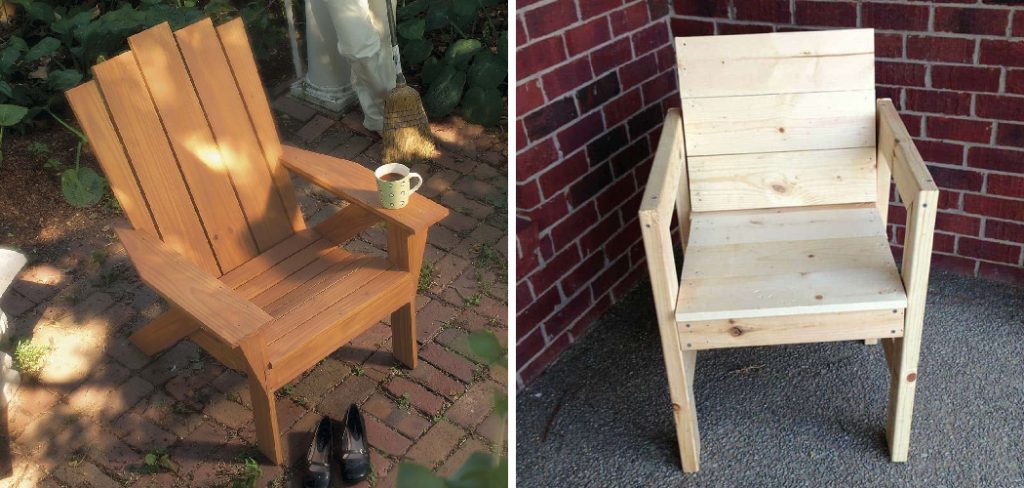
How to build a wooden chair is a rewarding project that combines creativity, craftsmanship, and functionality. Whether you’re an experienced woodworker or a beginner looking to develop new skills, crafting your own chair allows you to customize it to your exact needs and style preferences. This guide will take you through the necessary steps, tools, and materials to construct a sturdy and stylish wooden chair. Additionally, we will provide tips on how to maintain and care for your chair to ensure its longevity.
With patience and attention to detail, you can create a piece of practical and enduring furniture.
What Are the Benefits of Building Your Wooden Chair?
Building your own wooden chair may initially seem intimidating, but the benefits far outweigh any initial hesitations. Here are some reasons why you should consider taking on this project:
- Customization: When buying a pre-made chair from a store, you are limited to the style and design options. By building your chair, you have complete control over every aspect of its appearance. You can choose the type of wood, the size and shape of the chair, and even add personalized details like carvings or engravings.
- Cost Savings: Purchasing a high-quality wooden chair can be expensive. By building your own, you can save money on labor costs and potentially even materials if you can access cheaper or recycled wood.
- Satisfaction: A great sense of satisfaction comes from creating something with your own hands. Building your wooden chair allows you to take pride in your skills, craftsmanship, and the result.
- Learning Opportunity: Taking on a DIY project like building a wooden chair provides an opportunity to learn new skills and techniques. You can expand your knowledge in woodworking and gain valuable experience that can be applied to future projects.
- Unique Piece: When you build your own wooden chair, it will be one-of-a-kind. You can add personal touches and customize them to fit your needs and aesthetic preferences. This makes it a unique piece that you can be proud of and display in your home.
What Will You Need?
- Materials: The materials needed for building a wooden chair can vary depending on the design and style you choose. Some common materials include wood boards, screws, nails, wood glue, sandpaper, and varnish.
- Tools: You will also need certain tools to build your wooden chair such as a saw, drill, hammer, measuring tape, clamps, and chisels. It’s important to have the right tools in order to achieve accurate cuts and joints.
- Workspace: Having a designated workspace is crucial for building a wooden chair. It should be well-lit and ventilated and have enough space for workers to move around freely while working on the project.
9 Easy Steps on How to Build a Wooden Chair
Step 1. Plan and Design Your Chair
Before you begin building your wooden chair, take time to plan and design it carefully. Start by sketching out a simple blueprint or using design software to visualize your chair. Determine the chair’s dimensions, including its height, width, depth, and leg angles, based on the chair’s purpose and who will use it.
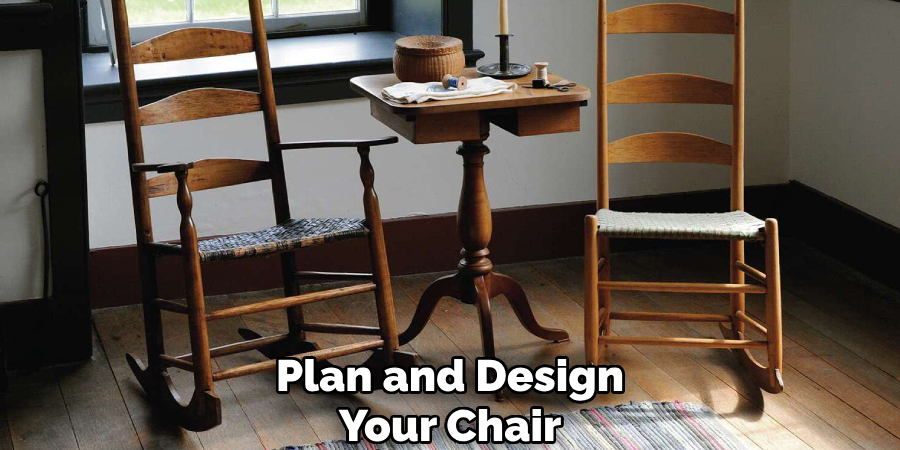
Decide on the style—whether it will be modern, rustic, or traditional—and select a suitable type of wood, such as oak, pine, or cedar, depending on the desired durability and appearance. Additionally, consider any special features you might want, such as armrests, cushions, or a curved backrest.
Step 2. Measure and Cut the Wood
Accurate measurements are crucial to building a well-balanced and sturdy chair. Use a measuring tape to carefully mark each component’s dimensions, such as the seat, legs, backrest, and armrests, based on your design plan. Double-check all measurements to ensure precision and avoid wasted materials. After marking the wood, use a saw—either a handsaw or a power saw, depending on your preference and skill level—to cut each piece to the required size.
When cutting, pay close attention to maintaining clean, straight edges, as uneven cuts can affect the final assembly of the chair. For pieces that require angled or curved cuts, consider using tools such as a jigsaw or miter saw for better accuracy.
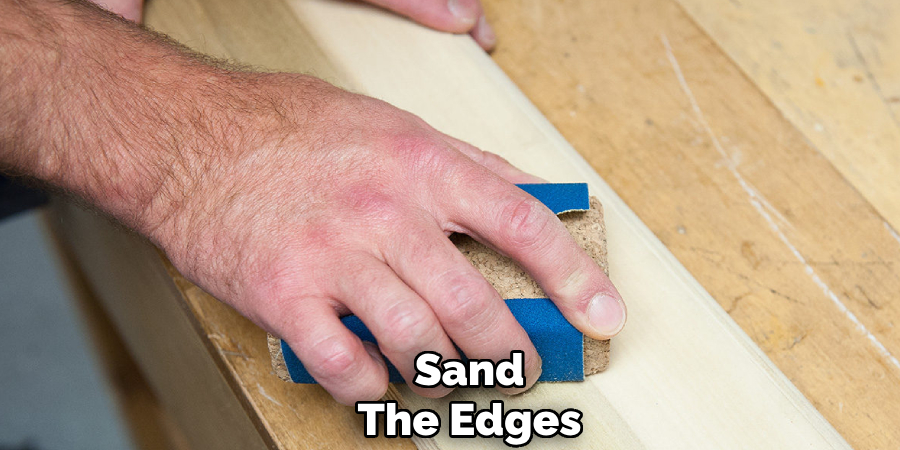
Step 3. Sand the Edges
After cutting the wood to the required sizes, it’s essential to sand the edges to create a smooth and professional finish. Sanding removes any rough or jagged edges left from the cutting process and ensures the wood fits together seamlessly during assembly. Start by using coarse-grit sandpaper to remove splinters or significant imperfections, then gradually move to finer grits for a polished surface.
Pay particular attention to corners and edges, as these areas are most prone to splinters and unevenness. If you’re working with shapes or curves, a sanding block or a rotary sander can make the process easier and more precise. Taking the time to sand the edges properly will also help the paint or stain adhere better, enhancing the final look and durability of the chair.
Step 4. Build the Chair Frame
To build the chair frame, start by gathering all the pre-cut pieces of wood, ensuring they meet the required dimensions outlined in your design plan. Lay them out on a flat surface to visualize the structure and confirm the fit of each piece. Begin by assembling the chair base, typically the front legs, back legs, and support beams.
Use wood glue on the joints for added stability, but don’t rely on glue alone—reinforce each joint with screws or nails. It’s essential to check the alignment of the pieces frequently during assembly to ensure everything remains straight and level. Use clamps to hold the parts securely in place as the glue dries, preventing any shifting or misalignment.
Step 5. Attach the Seat
Once the base of the chair is securely assembled, the next step is to attach the seat. Begin by positioning the seat board or slats onto the frame, ensuring they are correctly aligned and spaced evenly if using multiple slats. Use a measuring tape to verify consistency in spacing and overhang on all sides. Apply wood glue along the edges of the frame where the seat will rest to provide additional stability.
Secure the seat to the frame with wood screws, ensuring they are countersunk to prevent any protrusions that could cause discomfort or damage. If the seat design includes decorative details or cushions, this is a suitable time to attach or prepare those features as well.
Step 6. Add the Backrest
To attach the backrest, align it with the seat frame’s rear edge. Measure the backrest’s placement carefully to ensure it is centered and level, as any misalignment could affect the chair’s stability and appearance. Use clamps to hold the backrest in position while you secure it temporarily. Drill pilot holes into the rear frame through the backrest to prevent the wood from splitting. Fasten the backrest using wood screws, ensuring the screws are evenly spaced for both stability and aesthetics.

Step 7. Reinforce the Structure
Once the backrest is securely attached, it is essential to reinforce the entire chair structure further to ensure durability and long-term stability. Begin by inspecting all joints, particularly where the legs connect to the seat frame and where cross braces meet. Apply wood glue to any minor gaps or loose areas in the joints for added strength.
For larger joints or critical points of connection, consider inserting additional wood screws or using metal brackets for extra support.
Step 8. Sand the Entire Chair
Sanding is a crucial step to achieve a smooth and professional finish for your chair. Select the appropriate sandpaper grit based on the chair’s current condition. If the surface has rough spots, deep scratches, or old varnish, start with a coarse grit such as 60 or 80 to remove imperfections and level out uneven areas. Gradually work your way to finer grits, such as 120 and 220, to refine the surface and prepare it for staining or painting.
Pay special attention to corners, edges, and curved sections, ensuring no rough areas remain. To achieve a seamlessly, smooth texture, consider using a sanding sponge or flexible sanding block for contoured or intricate parts. Finally, wipe down the entire chair with a damp cloth or tack cloth to remove any dust particles left behind, as these can interfere with the application of finishes.
Step 9. Apply Varnish or Paint
Once you have prepared the surface and ensured it is clean and smooth, it’s time to apply varnish or paint. Begin by choosing the type of finish that best suits your chair and the intended use of the piece. Opt for a clear varnish or stain in a shade that complements your decor for a natural look that highlights the wood grain. Select a high-quality paint in your preferred color if a more vibrant or opaque appearance is desired.
By following the manufacturer’s instructions, apply the chosen finish using a brush or roller. Take care to avoid drips and brush strokes for a professional-looking result.

Conclusion
How to build a wooden chair requires planning, precision, and the right materials.
By carefully measuring, cutting, assembling, and finishing the pieces, you can create a sturdy and attractive piece of furniture. Attention to detail at each step, from selecting the wood to applying the finish, ensures a professional and long-lasting result.
With patience and effort, crafting your own chair can be a rewarding experience. You will leave with both a functional item and a sense of accomplishment.
Huston Douthit is a distinguished figure in the world of furniture design, with a decade of expertise creating innovative and sustainable furniture solutions. His professional focus lies in merging traditional craftsmanship with modern manufacturing techniques, fostering designs that are both practical and environmentally conscious. As the author of Fruniturix, Huston delves into the art and science of furniture-making, inspiring artisans and industry professionals alike.
Education
- RMIT University (Melbourne, Australia)
Associate Degree in Design (Furniture)- Focus on sustainable design, industry-driven projects, and practical craftsmanship.
- Gained hands-on experience with traditional and digital manufacturing tools, such as CAD and CNC software.
- Nottingham Trent University (United Kingdom)
Bachelor’s in Furniture and Product Design (Honors)- Specialized in product design with a focus on blending creativity with production techniques.
- Participated in industry projects, working with companies like John Lewis and Vitsoe to gain real-world insights.
Publications and Impact
In Fruniturix, Huston shares his insights on furniture design processes, materials, and strategies for efficient production. His writing bridges the gap between artisan knowledge and modern industry needs, making it a must-read for both budding designers and seasoned professionals.