

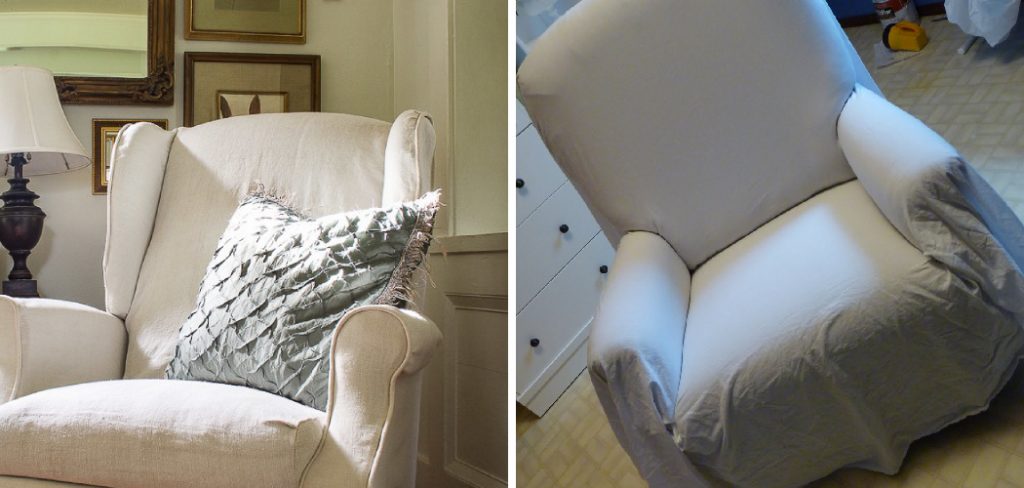
Learning how to make a recliner slipcover is a practical and creative way to preserve and enhance your furniture. Recliners are one of the most used pieces of furniture in any home, and over time, wear and tear can take a toll on their appearance. Slipcovers not only protect them but also provide an opportunity to refresh your interior decor with customizable fabrics and patterns.
Before getting started, you’ll need to gather a few essential materials. These typically include fabric of your choice, a measuring tape, scissors, pins, and a sewing machine. Select a durable fabric that complements your room’s aesthetic and can withstand daily use. If you’re unsure about dimensions, taking precise measurements of each section of your recliner—such as the backrest, armrests, and seat—will ensure a snug fit. Proper preparation will make the process smoother and increase the likelihood of a professional-looking result.
For those who want a personalized and budget-friendly solution, making your own recliner slipcover is an ideal option. You don’t need to be a professional seamstress to achieve great results. With a little patience, the right materials, and detailed step-by-step guidance, you can transform your recliner into a stylish and inviting centerpiece.
This article will guide you through every step of the process, helping you craft a custom slipcover that fits perfectly and meets your unique style preferences.
Why Making a Recliner Slipcover Is Worth the Effort
Recliners are often a family favorite, and their daily use can lead to stains, fading, or fabric damage. Slipcovers are a cost-effective and practical solution for prolonging the life of your recliner. Instead of purchasing a new chair, you can design a slipcover that revitalizes its look at a fraction of the cost.
Creating a recliner slipcover also allows for complete customization. Whether you prefer vibrant patterns, subtle tones, or durable fabrics that can hold up to pets and kids, the choices are entirely yours. This level of personalization ensures the slipcover not only protects your recliner but also complements your home decor perfectly.
Additionally, the act of making reclining sofa slipcover can be incredibly rewarding. It’s an opportunity to practice new DIY skills while producing something functional and beautiful. The result is a professionally tailored appearance achieved through your own creativity and effort. There’s no better blend of functionality, style, and a sense of accomplishment.
Step-by-Step Guide to How to Make a Recliner Slipcover
Step 1: Measure Your Recliner
The first step in learning how to make a recliner slipcover is taking accurate measurements. Start by carefully measuring each segment of the recliner, including the backrest, seat, footrest, armrests, and all other sections you intend to cover. Note down the dimensions with precision and add an extra 2–3 inches on all sides to allow for seams and adjustments.

This detailed measuring process ensures the fabric will fit snugly yet flexibly, moving with the recliner’s mechanisms. Pay special attention to areas with curves or contours. Craft paper or newspaper can come in handy for creating rough templates that match the recliner’s shape. These guides can be traced onto the fabric for cutting, reducing the chances of error.
Remember that accurate measurements form the foundation for the entire project. Starting with a good fit will save you time and frustration later in the slipcover-making process.
Step 2: Choose Your Fabric
Selecting the perfect fabric is important for achieving both durability and style. Opt for upholstery-grade fabric that is easy to work with and fits your needs. Cotton, canvas, or polyester blends are popular choices for their balance of resilience and flexibility. If you have pets or children, consider stain-resistant or machine-washable materials for added practicality.
Think about the visual impact as well—solid colors can bring a sense of sophistication, while patterned or textured fabrics can add character. Make sure to purchase enough fabric to accommodate all sections of the recliner, factoring in extras for mistakes or adjustments.
Finally, pre-wash your fabric if necessary to prevent shrinkage later. This ensures that the final slipcover maintains its integrity after washes and daily use.
Step 3: Cut the Fabric Pieces
Using your measurements and templates, carefully cut the fabric into pieces for each section of the recliner. Lay the fabric on a flat surface, tracing the templates or measurements with chalk or a washable fabric pencil. Use sharp fabric scissors to ensure clean and precise cuts.
Accurate cutting is crucial for achieving a sleek and tailored final look. Take your time to double-check the measurements and fit each piece loosely over the recliner before proceeding. This step also offers an opportunity to make any adjustments before moving to assembly.
Investing effort during the cutting stage can save you from encountering ill-fitting pieces and unnecessary fabric waste.
Step 4: Pin and Fit the Pieces
Arrange the fabric pieces on your recliner to see how they align. Use sewing pins to hold them together, allowing you to make fine adjustments and ensure a snug fit. Start with the largest sections, such as the backrest and seat, and gradually work your way to smaller areas like the arms and footrests.
Fitting and pinning the fabric is akin to creating a dress rehearsal for the final slipcover. It lets you visualize the overall fit and make minor tweaks before stitching begins. Pay extra attention to seams and overlaps, ensuring smooth transitions between pieces for a cohesive appearance.
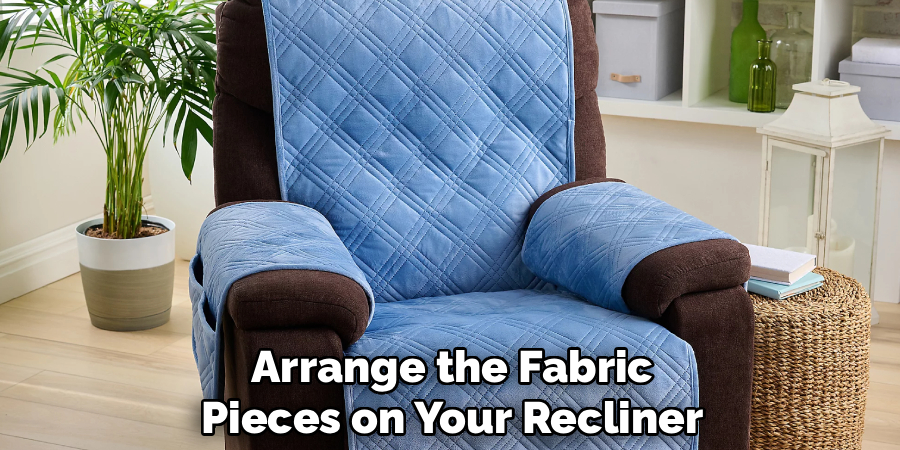
This stage requires patience and precision, but it sets the foundation for a slipcover that fits like a glove.
Step 5: Sew the Slipcover
Once you’re satisfied with the fit and pinning, it’s time to stitch the fabric pieces together. Use a sewing machine for clean, secure seams. Choose a strong thread that matches your fabric, and employ a simple straight stitch for most sections. Zigzag stitches are useful for reinforcing areas that will experience more wear and tear.
Sew the pieces one at a time, starting with the larger sections. Keep the fabric properly aligned throughout the process, and pause frequently to check the stitching and fit.
This step transforms the pinned fabric into a cohesive slipcover, ready to drape over your recliner. Consistent stitching and attention to detail will result in a polished, professional-quality finish.
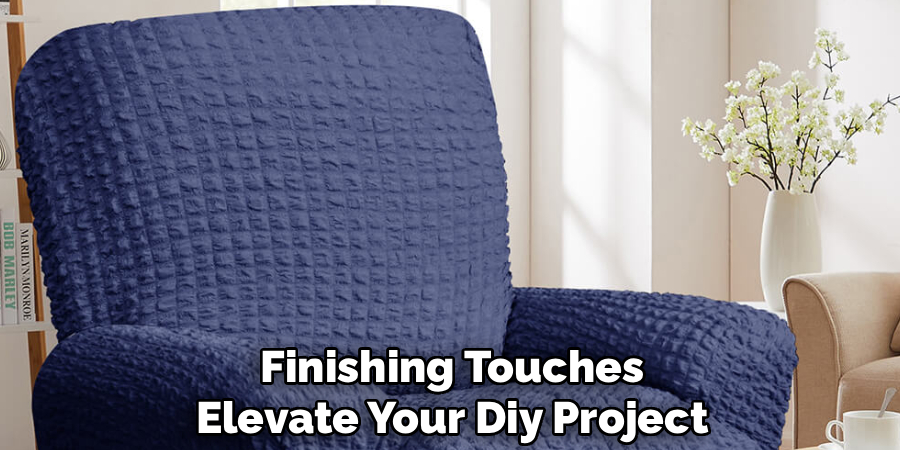
Step 6: Add Finishing Touches
After sewing the basic structure, focus on refining the details. Use hem tape or additional stitching to secure loose edges. Consider adding zippers, Velcro, or ties to make the slipcover easy to remove or adjust. These small features add functionality while enhancing the overall aesthetic.
If your recliner has distinct curves or hinges, consider adding darts or tucks for a better fit. Fabric-specific adhesives may also help secure tricky areas where stitching is impractical.
Finishing touches elevate your DIY project from basic to exceptional, ensuring a slipcover that is both stylish and practical.
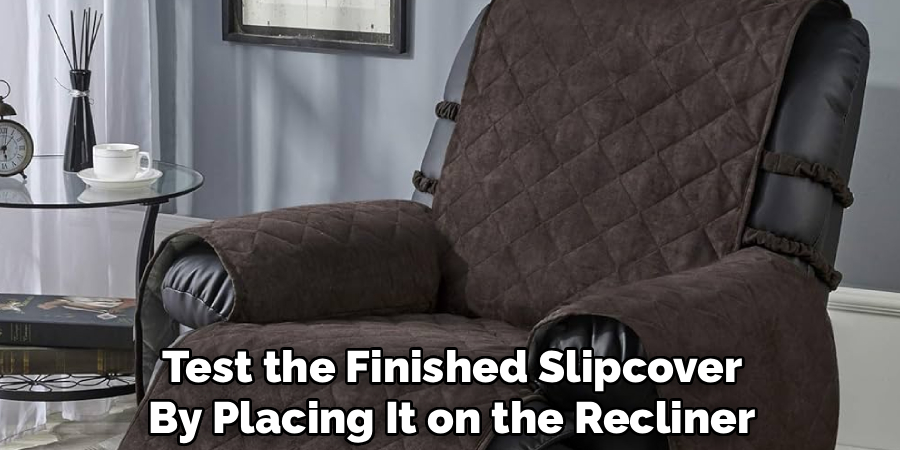
Step 7: Test the Fit
Before declaring your project complete, test the finished slipcover by placing it on the recliner. Adjust any areas that seem too tight or loose, and make notes for minor tweaks. A final check ensures that the slipcover fits securely and complements the recliner’s design.
Testing also provides an opportunity to see the slipcover in action, confirming its durability and ease of adjustment. With this step complete, your recliner is ready for its stylish new look!
Detailed Measuring Process
Accurate measurements are essential for creating a slipcover that fits perfectly. Begin by using a fabric measuring tape to capture the dimensions of each section of the recliner. Start with the largest areas, such as the backrest, seat, and footrest, measuring both length and width. Be sure to include measurements for curved or angled sections, as these require more precision to ensure the fabric conforms properly.
Next, focus on smaller details like the armrests and any distinctive features, such as pillows or recliner levers. Measure these areas carefully, accounting for any unique shapes or textures. It’s also important to measure with some allowance for seam margins and fabric overlap, typically adding 1 to 2 inches to your measurements.
To organize your work, record your dimensions clearly, labeling each section of the recliner. This will make it easier to refer to your notes when cutting and sewing the fabric. Diligence at this stage ensures the slipcover will fit securely while maintaining a polished and professional appearance.
Frequently Asked Questions
What type of fabric is best for a slipcover?
Upholstery-grade fabrics like cotton, canvas, or polyester blends are ideal for slipcovers. They offer durability and flexibility needed for a recliner’s movement. Choose a washable fabric for easy maintenance.
How long does it take to make a recliner slipcover?
The time depends on experience and complexity. Beginners may need 6–10 hours spread across a few days, while seasoned crafters might complete it in 4–6 hours. Taking accurate measurements saves time.
Do I need a sewing machine to make a slipcover?
While hand sewing is possible, a sewing machine ensures cleaner, faster, and more durable seams. If you don’t own one, consider borrowing or renting to complete the project more efficiently.
Can I wash the slipcover after making it?
Yes, as long as the fabric is machine washable. Pre-washing the fabric before sewing helps prevent shrinkage. Always review the care instructions for your chosen material.
Are slipcovers suitable for all recliners?
Most standard recliners can accommodate slipcovers, but highly complex designs may require advanced techniques or professional assistance. Accurate measurements are key to making a slipcover work.
Conclusion
Creating a recliner slipcover is an enjoyable and rewarding DIY project that allows you to customize your furniture while extending its lifespan. By following these steps, you can learn how to make a recliner slipcover that fits beautifully and enhances your interior design.
Slipcovers not only protect your furniture but also offer a cost-effective way to refresh your home décor. They come in a variety of fabrics, patterns, and colors, allowing you to personalize your space according to your style preferences. Additionally, slipcovers are easy to remove and wash, making them a practical solution for households with pets or children.
With minimal tools and some creativity, you’ll enjoy the satisfaction of transforming a worn recliner into a stylish centerpiece. Now is the perfect time to explore your creativity and give your recliner a much-needed update. Get started on your slipcover project today!
Huston Douthit is a distinguished figure in the world of furniture design, with a decade of expertise creating innovative and sustainable furniture solutions. His professional focus lies in merging traditional craftsmanship with modern manufacturing techniques, fostering designs that are both practical and environmentally conscious. As the author of Fruniturix, Huston delves into the art and science of furniture-making, inspiring artisans and industry professionals alike.
Education
- RMIT University (Melbourne, Australia)
Associate Degree in Design (Furniture)- Focus on sustainable design, industry-driven projects, and practical craftsmanship.
- Gained hands-on experience with traditional and digital manufacturing tools, such as CAD and CNC software.
- Nottingham Trent University (United Kingdom)
Bachelor’s in Furniture and Product Design (Honors)- Specialized in product design with a focus on blending creativity with production techniques.
- Participated in industry projects, working with companies like John Lewis and Vitsoe to gain real-world insights.
Publications and Impact
In Fruniturix, Huston shares his insights on furniture design processes, materials, and strategies for efficient production. His writing bridges the gap between artisan knowledge and modern industry needs, making it a must-read for both budding designers and seasoned professionals.