

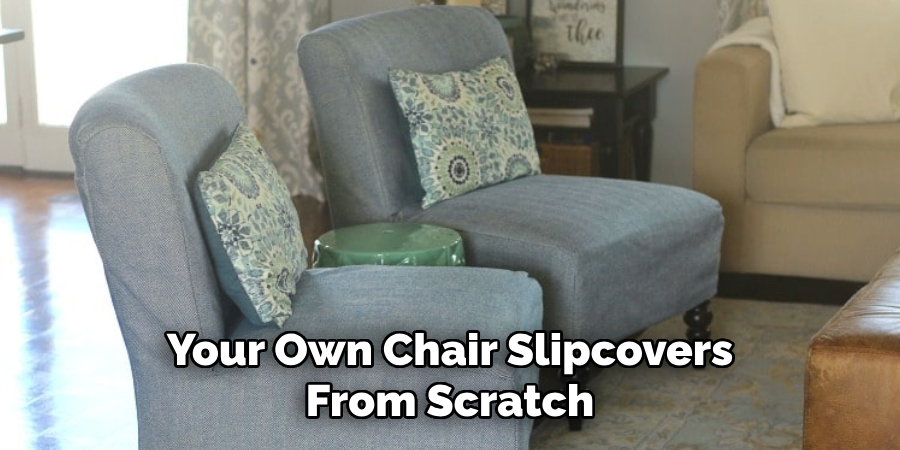
Slipcovers are a great way to update the look of your chairs without spending a lot of money on new ones. They can also protect your chairs from spills, stains, and general wear and tear. Making chair slipcovers may seem daunting, but with the right materials and basic sewing skills, anyone can create beautiful slipcovers for their chairs.
In this guide, we will walk you through the process of how to make chair slip covers step by step. We will cover all the materials and tools you need and the different styles and designs you can choose from. By the end, you will have the knowledge and skills to create your very own custom slipcovers for your chairs.
Understanding Chair Slip Covers
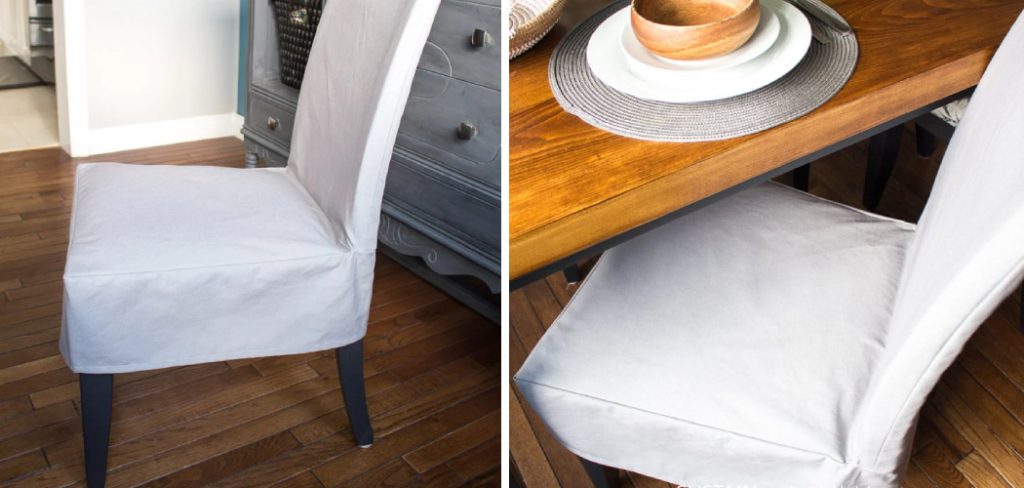
Before we begin making chair slipcovers, it is important to understand what they are and how they can benefit you. Chair slipcovers are essentially like a fabric “jacket” for your chairs. They cover the entire chair, providing a new look while protecting the original upholstery.
There are several reasons why people choose to use slipcovers on their chairs. Some may want to update the look of their chairs without buying new ones, especially if they have sentimental value or are high-quality pieces.
Others may use slipcovers to protect their chairs from young children or pets who can easily stain or damage the fabric. Slipcovers are also a great option for those who like to change their home decor frequently, as they can easily be removed and replaced with a different style or design.
Tools and Materials You Will Need to Make Chair Slip Covers
- Fabric of your choice
- Measuring tape
- Scissors
- Sewing machine or needle and thread
- Pins or clips
- Iron and ironing board (optional)
- Ruler or straight edge (optional)
Step-by-step Guidelines on How to Make Chair Slip Covers
Step 1: Measure Your Chair
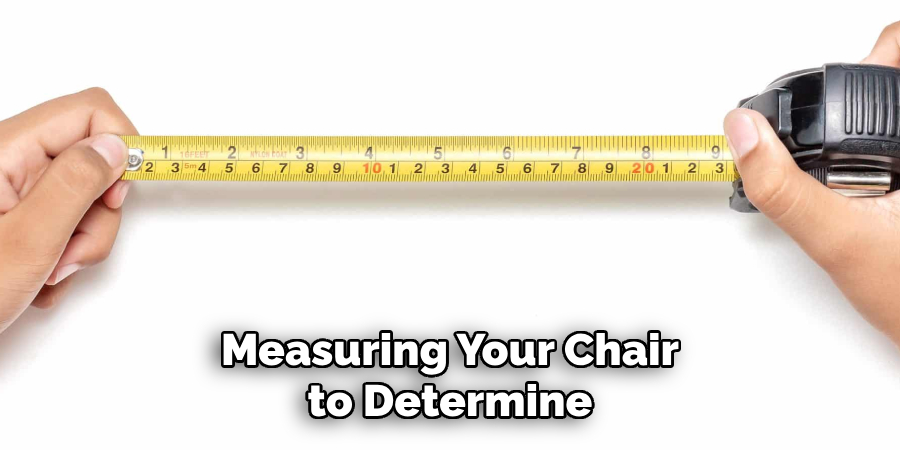
Start by measuring your chair to determine the fabric you need. Measure the height from the top of the backrest down to the floor and from one side of the seat to the other for the width. Add a few inches to each measurement for seam allowance. Measuring the seat depth and the distance between the legs is optional but can help you get a more accurate fit for your slipcover.
Step 2: Choose Your Fabric
Choose a fabric that fits your needs and preferences. You can use any fabric, but it should be durable enough to withstand frequent use and washing. Consider the fabric’s color, pattern, and texture to ensure it complements your existing decor. Choosing a washable fabric will make it easier to maintain and keep your slipcovers looking fresh. If you are new to sewing, starting with a simple solid-color fabric rather than a pattern may be best.
Step 3: Cut Your Fabric
Using your measurements as a guide, cut out your fabric pieces. You will need one piece for the backrest, one piece for the seat, and two side pieces (one for each side of the chair). Remember to add extra fabric for seam allowance. While you can cut the fabric with scissors, using a ruler or straight edge can help create straight lines for a neater finish.
Step 4: Pin or Clip Your Fabric
Lay the pieces of fabric over your chair to ensure they fit correctly. Adjust if needed, and then pin or clip the fabric in place. This will prevent it from shifting while sewing and ensure a more precise fit. Make sure the fabric is smooth and without wrinkles or bunching. This will help create a professional-looking slipcover.
Step 5: Sew the Fabric Together
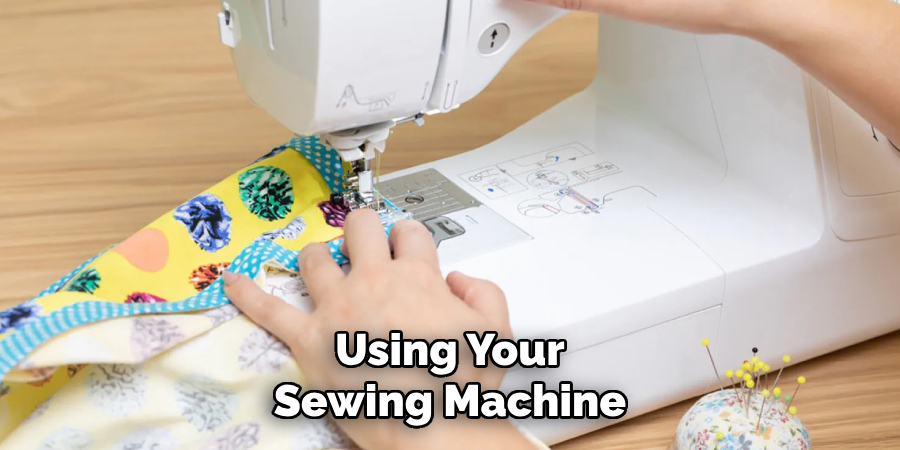
Using your sewing machine or needle and thread, sew the fabric pieces together along the edges with a straight stitch. Start by sewing the backrest and seat pieces together and attaching the side pieces. Be sure to remove any pins or clips as you sew, and adjust the fabric as needed to create a snug fit. If you use a sewing machine, remember to backstitch at the beginning and end of each seam for extra durability.
Step 6: Hem Your Slipcover
To finish off your slipcover, hem the bottom edges by folding them over twice and sewing along the edge. This will create a clean and neat finish while also preventing fraying. At this stage, you can add any decorative elements, such as piping or buttons. This step is optional but can add a personalized touch to your slipcover.
Step 7: Place Your Slipcover on the Chair
Once you have completed all the sewing, it’s time to place your slipcover on the chair. Start by fitting the backrest piece onto the chair and then maneuvering the seat piece into place. Smooth out any wrinkles or creases, and adjust the fit if needed. Finally, tuck in the excess fabric at the bottom of the chair to create a snug fit.
Following these simple steps, you can create beautiful and functional slipcovers for your chairs. With creativity and the right materials, you can easily update the look of any chair in your home. Experiment with different fabrics and styles to find the perfect fit for your decor and personal style. Enjoy the process of making something unique and practical for your home – it’s easier than you think! So, have fun and get creative with your chair slipcover projects. Happy sewing!
Additional Tips and Tricks to Make Chair Slip Cover

1. If you are using a sewing machine, make sure to use the right type of needle for your fabric. For example, if you are working with a thick or heavy fabric, use a thicker and stronger needle to prevent it from breaking.
2. Always add an extra inch on all sides for seam allowance when measuring and cutting your fabric. This will ensure that your slipcover fits snugly over the chair. You can always trim off any excess fabric later.
3. Consider using slipcover weights or furniture grips to keep your slipcover in place and prevent it from slipping off the chair. These can easily be found at most hardware or home improvement stores.
4. Add piping or decorative trim along the edges of your slipcover for a more professional and polished look. This will add a nice finishing touch and give your slipcover a custom-made look.
5. When choosing the fabric for your slipcover, choose materials that are easy to clean and maintain. This will make keeping your slipcover looking fresh and new easier, especially if you have children or pets.
6. Add darts or pleats to your slipcover for a more fitted look. This will help give it a more tailored and snug appearance.
7. Remember to mix and match fabrics for your slipcover. Different patterns or textures can create a unique and eclectic look. Just make sure to choose fabrics that complement each other well.
8. Use upholstery thread when sewing your slipcover for added strength and durability. This type of thread is specifically designed for heavy-duty projects like slipcovers.
9. Add velcro or zippers to your slipcover for easy removal and washing. This will make it easier to keep your slipcover clean and fresh without constantly taking the entire slipcover off the chair.
10. Practice on a small, simple slipcover before tackling a larger or more complex project. This will help you get familiar with the process and techniques involved before taking on a bigger challenge.
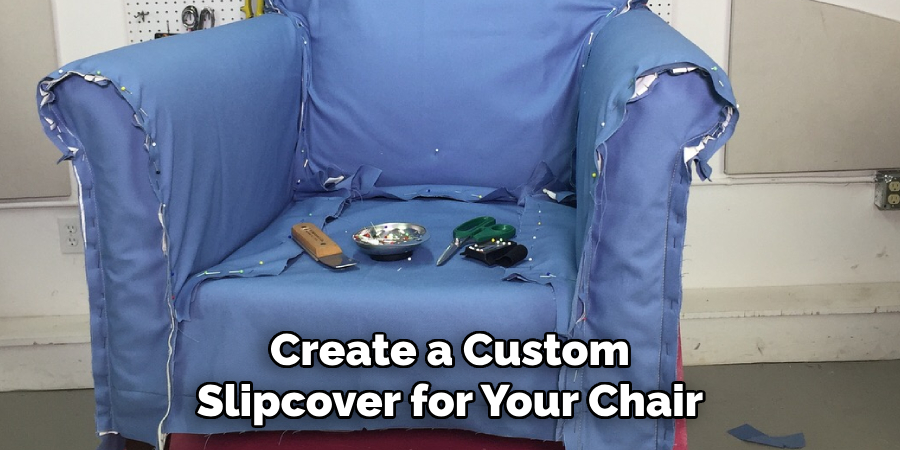
These additional tips and tricks will help you create a custom slipcover for your chair. With the right materials and techniques, you can transform any old or worn-out chair into a stylish and functional piece of furniture. Feel free to get creative and experiment with different fabrics and designs to achieve the perfect look for your space. Happy crafting!
Things You Should Consider to Make Chair Slip Covers
1. The material is the first thing you should consider when making chair slipcovers. The type of material used will determine how durable and long-lasting your slipcovers will be.
2. You should choose a material that is easy to clean and maintain, especially if you have kids or pets at home. Materials like cotton, linen, and polyester are great options, as they can be easily washed and do not require any special care.
3. Another important factor to consider is the color and pattern of the material. If you have a white or neutral-colored chair, you can opt for bright and bold patterns to add personality to your room. On the other hand, if your chair has a busy design, it’s best to go for solid colors or subtle patterns that will stay consistent.
4. Measuring your chair accurately before purchasing or cutting the fabric for your slipcovers is important. This will ensure a snug fit and prevent any unnecessary adjustments later on.
5. When choosing the design and style of your slipcover, think about your room’s overall aesthetic and how you want it to complement your existing decor. For example, if you have a modern and minimalistic room, you can opt for clean, sleek slipcovers with no frills. If your room has a more traditional or rustic feel, you can choose slipcovers with ruffles or lace detailing.
6. Consider the functionality of your slipcovers as well. Avoid delicate fabrics that can easily tear or get stained if you have kids or pets. Instead, choose durable materials that can withstand daily wear and tear.
7. It’s also important to factor in the cost of the materials when making chair slipcovers. Some fabrics can be more expensive than others, so consider your budget and choose a material that fits within it.
8. Remember to pay attention to the finishing details of your slipcovers, such as zippers, buttons, and ties. These small details add a touch of elegance and make them easier to put on and take off for washing.
9. If you need more confidence in making your own chair slipcovers from scratch, you can always consider purchasing ready-made slipcovers or hiring a professional to make them for you. This way, you can still achieve the desired look without the hassle of making them yourself.
Following these considerations will help you create beautiful and functional chair slipcovers that protect your furniture and enhance the overall look of your room. With the right materials, design, and attention to detail, your chair slipcovers will be a stylish addition to your home decor. So get creative and have fun making your own customized slipcovers! Try incorporating some decorative elements like piping or pleats to add a touch of personality and uniqueness to your slipcovers. You can also experiment with different fabrics, textures, and colors to create a one-of-a-kind look for your chairs.
Caring Tips for Chair Slip Covers
1. Regularly shake off loose debris and crumbs from the slip1. Regularly shake off loose debris and crumbs from the slipcover to prevent them from being ground into the fabric. Cover to prevent it from being ground into the fabric.
2. Vacuum your slipcovers weekly using a soft brush attachment to remove any accumulated dirt or dust. This will help prolong the life of your slipcover and keep it looking fresh.
3. If your slipcover is machine washable, follow the manufacturer’s instructions for washing and drying. Be sure to use a gentle cycle and mild detergent to avoid damaging the fabric.
4. If your slipcover is not machine washable, spot-clean any stains or spills using a damp cloth and mild soap as soon as possible. Do not rub too aggressively, as this can damage the fabric fibers.
5. Consider having your slipcover professionally cleaned for tough stains to avoid any potential damage.
6. Avoid placing slipcovers in direct sunlight for extended periods of time, as this can cause fading and discoloration.
7. If your slipcover is made from a delicate fabric, consider using arm covers or furniture protectors to minimize wear and tear. These can easily be removed and washed separately.
8. If you have pets, consider using a slipcover made from a durable, pet-friendly fabric that is easy to clean and resistant to scratches or tears.
9. Rotate your slipcovers periodically to distribute wear evenly and prevent any one area from becoming excessively worn or faded.
10. When not in use, store your slipcovers in a cool, dry place to prevent any potential mold or mildew growth.
Following these caring tips for chair slipcovers will keep your furniture looking great and help extend its lifespan. With proper care and maintenance, you can continue enjoying the look and feel of a brand-new slipcover for years. Additionally, investing in high-quality slipcovers made from durable materials can minimize the need for frequent replacements, saving you time and money in the long run. Remember to always refer to the manufacturer’s instructions for specific care guidelines, as different fabrics may require different cleaning and maintenance methods. Happy slip covering!
Frequently Asked Questions
Can I Use Any Fabric to Make Chair Slip Covers?
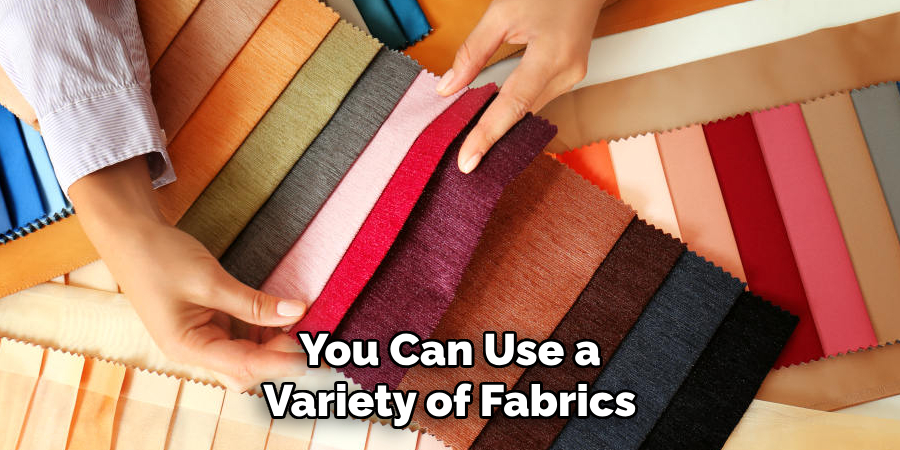
Yes, you can use a variety of fabrics to make chair slipcovers. However, it is important to consider the durability and stretchability of the fabric. Heavyweight fabrics like canvas or denim are more durable and better suited for high-traffic areas. In contrast, lighter-weight fabrics like cotton or linen may be easier to work with and better for occasional use. Fabrics with a bit of stretch, such as spandex or polyester blends, can also be helpful in creating a snug fit for your chair slipcovers.
Do I Need to Have Sewing Skills to Make Chair Slip Covers?
Some basic sewing skills are recommended when making chair slipcovers but are unnecessary. If you have a sewing machine, you can easily create simple slipcovers using straight and zigzag stitches. However, if you don’t have a sewing machine or don’t feel comfortable sewing, there are no-sew options available either. These include fabric glue or safety pins to secure the slipcover.
How Do I Measure My Chairs for Slip Covers?
To ensure a proper fit, it is essential to measure your chairs accurately. Start by measuring the width and length of the seat cushion. Add 4 inches to both measurements to account for seam allowance and extra fabric for tucking. Next, measure the height of the chair back from the top of the chair to where you want the slipcover to end. Again, add a few inches for seam allowance and tucking. Lastly, measure the width of the chair back at its widest point. This measurement will determine how wide your slipcover must fit over the chair.
Can I Make Slip Covers for Different Types of Chairs?
Yes, using this process, you can make slipcovers for different types of chairs. The measurements may vary depending on the size and shape of the chair, but the general steps remain the same. You may need to adjust chairs with arms or different back heights, but this method can be used for various chairs.
How Do I Care for My Chair Slip Covers?
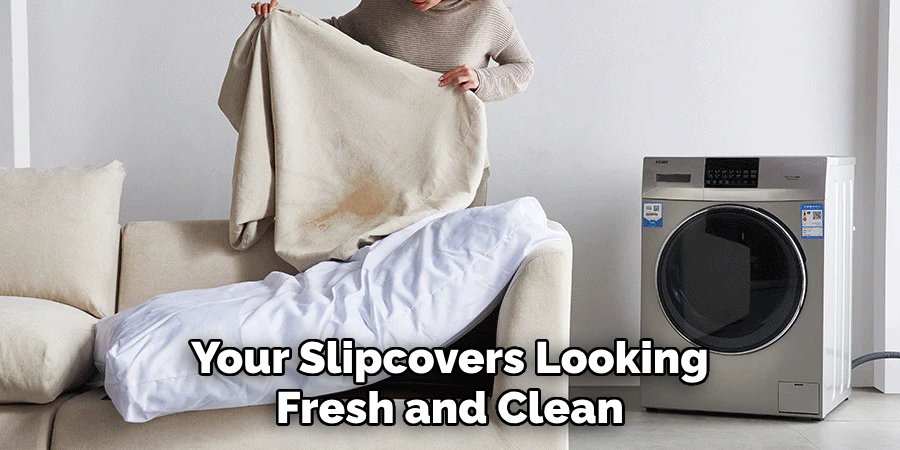
To keep your slipcovers looking fresh and clean, it is recommended to wash them regularly according to the fabric’s care instructions. Most fabrics can be machine washed, but always double-check first. If your slipcovers are made with delicate or dry-clean-only fabrics, spot cleaning may be necessary. Shaking out the slipcovers and smoothing any wrinkles before placing them back on the chairs is also helpful.
Conclusion
Now you know how to make chair slip covers and can confidently create your own slipcovers for various chairs in your home. Remember, you can use a variety of fabrics and adjust the measurements to fit different types of chairs. With some basic sewing skills or alternative no-sew methods, you can easily transform the look of your chairs and protect them from wear and tear. And remember to care for your slipcovers regularly to keep them looking their best. Happy crafting!
Huston Douthit is a distinguished figure in the world of furniture design, with a decade of expertise creating innovative and sustainable furniture solutions. His professional focus lies in merging traditional craftsmanship with modern manufacturing techniques, fostering designs that are both practical and environmentally conscious. As the author of Fruniturix, Huston delves into the art and science of furniture-making, inspiring artisans and industry professionals alike.
Education
- RMIT University (Melbourne, Australia)
Associate Degree in Design (Furniture)- Focus on sustainable design, industry-driven projects, and practical craftsmanship.
- Gained hands-on experience with traditional and digital manufacturing tools, such as CAD and CNC software.
- Nottingham Trent University (United Kingdom)
Bachelor’s in Furniture and Product Design (Honors)- Specialized in product design with a focus on blending creativity with production techniques.
- Participated in industry projects, working with companies like John Lewis and Vitsoe to gain real-world insights.
Publications and Impact
In Fruniturix, Huston shares his insights on furniture design processes, materials, and strategies for efficient production. His writing bridges the gap between artisan knowledge and modern industry needs, making it a must-read for both budding designers and seasoned professionals.